Around the half way mark about 5 hours into the Fairlight repatriation quest, a big AV van pulled alongside me on the deadly Hume Highway and lingered rather than just passing. A little way up the road I stopped for fuel and noticed the AV van there refuelling.
On the way back from paying, I noticed two guys peering into the back of my car at the gear. "Are they Fairlights?" one guy asked. He mentioned he'd always wanted one and we talked for about a half an hour about music and gear and I told them about the task ahead. "Good luck!!" he said sarcastically in the style of Shaun Of The Dead when Shaun mentions to his ex he's off to try to make it through the zombie wasteland to The Winchester pub. They were on their way to Sydney to record an event in their mobile terabyte infested hi-tech recording van. Me with a dead kilobyte munching relic of yesteryear.
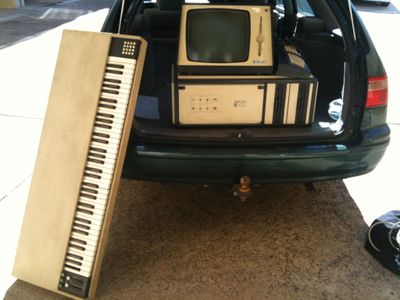
Back in Sydney, I lugged all the bits upstairs to start work. Heavy stuff. The thought of artists lugging their Fairlights to gigs seems absurd...
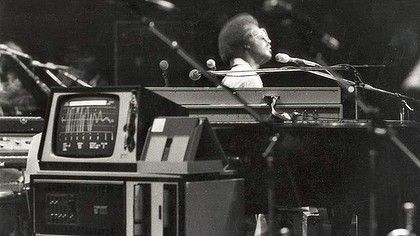
Stevie Wonder on stage with an early Fairlight CMI
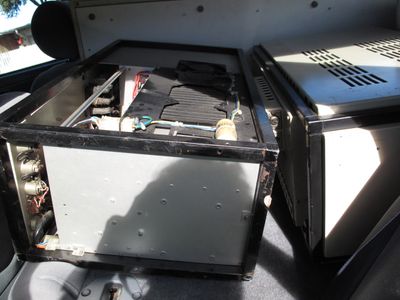
The main CPU has two 8" floppy drives, 8 voice cards plus big chunky PSU and a bunch of main processor, VDU, memory and floppy boards and several wires hung from the slots. Then there's the cables, screen, keyboards.
I had also grabbed another almost bare chassis with no PSU which i hoped I may be able to salvage parts from.
With the old girl now safely back but a stone's throw from her birthplace in Fairlight, first task would be to establish exactly what was wrong.
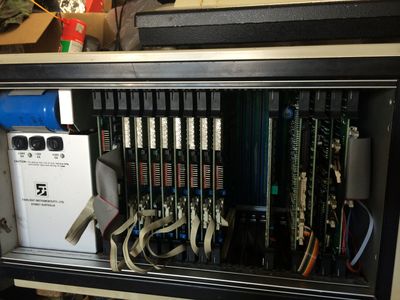
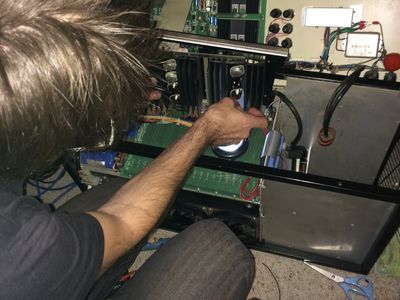
I found all the fuses in the VDU and CPU were blown so a quick trip to Jaycar sorted that out. Next was to check the state of the power supplies. Luckily accessing the components is pretty much like a modern computer. Removing the sides and top I was easily able to pull each of the cards and lay them out in numbered order.
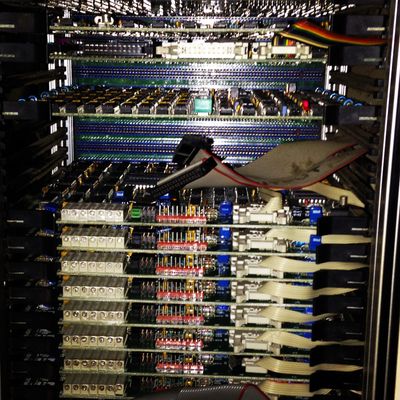
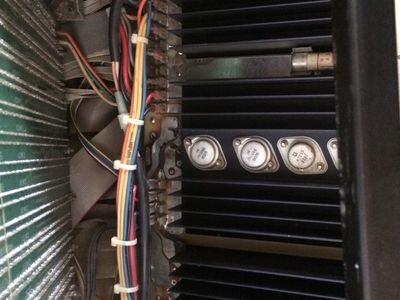
CMI Voice cards, VDU and floppy boards
Each Fairlight card has a unique model number and with a quick search online I was able to find a list of the original boards and components that made up a series IIX fairlight from The Holmes Page.. And what they all do.
This page is a great resource for tricky synth repairs and info and I am constantly amazed at how helpful people you're never likely to meet in person can be online. Thank you.
After a look at the insides and running a vacuum over the boards which looked pretty clean, I used some 2000 grit wet and dry paper to lightly clean the contacts on the edges of each card to make sure they were all shiny. Several were black with oxidisation but they cleaned up well. Checking the capacitors on the boards, I didn't see any that were overly puffy or bulging which is a good sign.
Capacitors have a very long life and the popular obsession with "re-capping" everything is a total waste of money In my opinion. When they go, you can often see and hear them failing with crackles, farts, squeals and pops. They leak, go puffy or change colour or even totally explode leaving a pair of wire legs and bits of yellowish insulation like globs about the circuit board. I've found there's also no point in buying $5 capacitors, the cheapies work just as well in most circuits as long as the capacitance value is the same. The value is either right or wrong and paying more makes no difference to the audio quality just your bank balance...The voltage rating of the new capacitor can be higher And the physical size is not that important.
I digress...Some of the solder joints were dull so I sucked off the old solder and gave them a nice new shiny coating.
Leads were checked for continuity between each end and all seemed good so I thought I'd have a go at firing it up and seeing how far I got.
I chose a system disk, slipped it into one of the drives and clamped it shut. Gritting my teeth, I flicked the power switch...
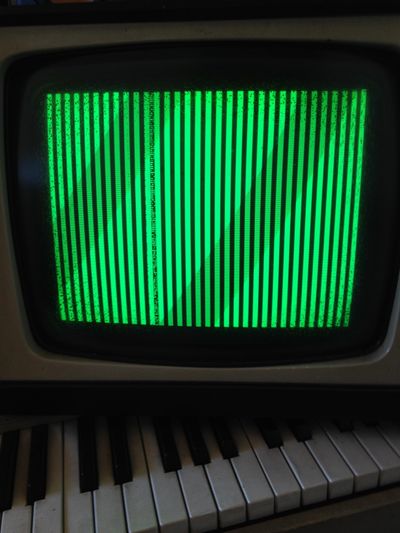
Green lines...great. Something was obviously not good. I checked the video card connectors and found a few of the pins had come loose from the plug. Once I had them re-inserted and tight, i also pulled the video card and reseated that. I tried again...
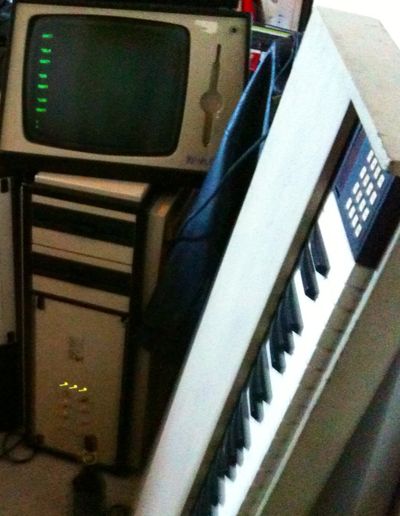
That's more like it! Although, I've put the disk in the wrong drive.
Ok now to switch the disk to the 'A' drive and try loading the operating system...
After digging through the disks, I managed to get the system to boot and even an 'RS' sequence loaded...
According to Page2 of the fairlight o.s (keyboard setup) some of the voice cards were not working but generally all went pretty well for the next few minutes until I started to get disk errors then a crash. When trying to start again the lights starting flickering then dead. A puff of smoke. I checked the fuses and several had blown again. Ok time to use my brain and get to the real source of the problem. Damn thought I might fudge it, I hate using my brain.
Getting Stuck Into It
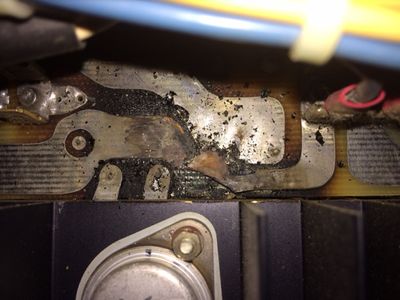
Once I had the machine apart again and all cards out, I took some photos of the insides to remember where everything went and on closer inspection of these photos I noticed what looked like some burn on the power supply circuit board. In fact the tracks had melted completely off the board! Here was a major part of the issue.
CMI PSU Underside drama and knuckle grater
When I managed to get the board out to check, the damage was much worse than what it had first appeared with entire tracks missing off the circuit board and many totally blackened components including some very large ceramic resistors. A bit more searching online and I came across another great site http://cmi.fairlightus.com/ with the original circuit schematics and even disk images for the CMI.
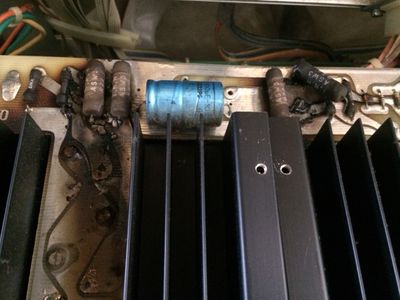

very hot tracks
After a few weeks, I took delivery of some large ceramic resistors I got from the U.S to replace the melted originals. These are configured as current limiters and are chunky puppies that get hot so I went for higher wattage replacements as the originals are no longer made.
time to see what I could salvage from the spare chassis..."Bo bow"...someone had already removed the power supply board so nothing useful in there.
So back to the trashed board, using a toothbrush and cleaning alcohol I scrubbed the circuit boards to assess the damaged tracks. They were non-existent with only ghostly shadows of where they were so some repair work was needed here too. I used some large gauge wire and following the wiring schematic, point to point wired the resistors, capacitors and transistors directly bypassing the circuit boards altogether breadboard style.(thanks Peter Wielk @ Horizontal Productions for detective help and circuit diagrams).
Next step after some advice ( thanks dad!), was to check all the op amp transistors in the 5 volt power circuit they are configured so each one delivers 5 volt 4.5 amp and the combined output of all four connected in series contribute the 5 volt 18 amp needed for the the Fairlight's disk drives and to power all the cards. Problem with this design is when one of these or the resistors go, the circuit goes into chaos causing way too much current through the other resistors which heat up and a cycle of thermal runaway begins which ends in clouds of white smoke and tears.
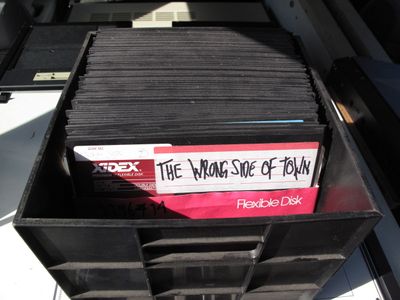
more like right side of town but wrong side of midnight...
Getting to the big silver op amps is a pain involving cut knuckles and various swearword vocabulary building techniques for which I'm becoming quite used to.
Sure enough, measuring across the pins of several of these gave me no reading so toasted.
After another week or two wait and another package arrived with the bits. What a joy to finally flick the switch and hear the fans kick in and the shuffling back and forth of the disk drive.
Disks only last so long and the majority of disks worked once or twice and never again. This led me to thinking about replacing a floppy drive with something a little friendlier for day to day work.
There happens to be a ready-to-go option in the form of the MuStudio flash kit which replaces one drive with a double sided simulating flash card option allowing boot-up, save and load all from SD card. It's not cheap but works well and saves a heap of tedious work. It also comes with the entire factory library which is a big bonus.

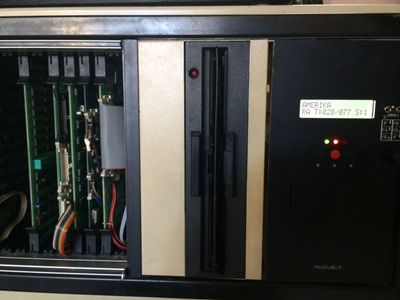
the MuStudio Flash kit & installed
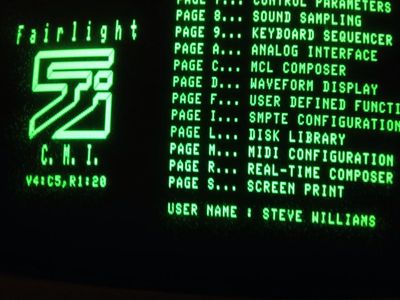
finally...a boot up!
But it wasn't over yet. I was hearing only a few of the possible eight voices. After a few more weeks of fiddling and replacing a few suspect looking voice card connectors I decided it must be a amplifier problem at the point where all of the voices are mixed. Pulling the back off to examine the large ribbon cable to which all the voice board's are attached, I discovered if I half removed the large connector, more voices would start working. this turned out to be a squashed wire in one of the voice card connectors shorting out the signal. Once i freshly cut the ribbon cable and attached a new voice card connector, all voices came back...yeahyyyy!
standby for the final blog of the rebuild where I attempt to make a replacement key out of a lump of wood, tackle the light-pen and hit the road to finally deliver the beast to it's rightful owner...